
DIY golf simulator enclosure with screen
Golf Simulator Enclosure, Screen and Mat Bundle Checklist: What to Buy and in What Order
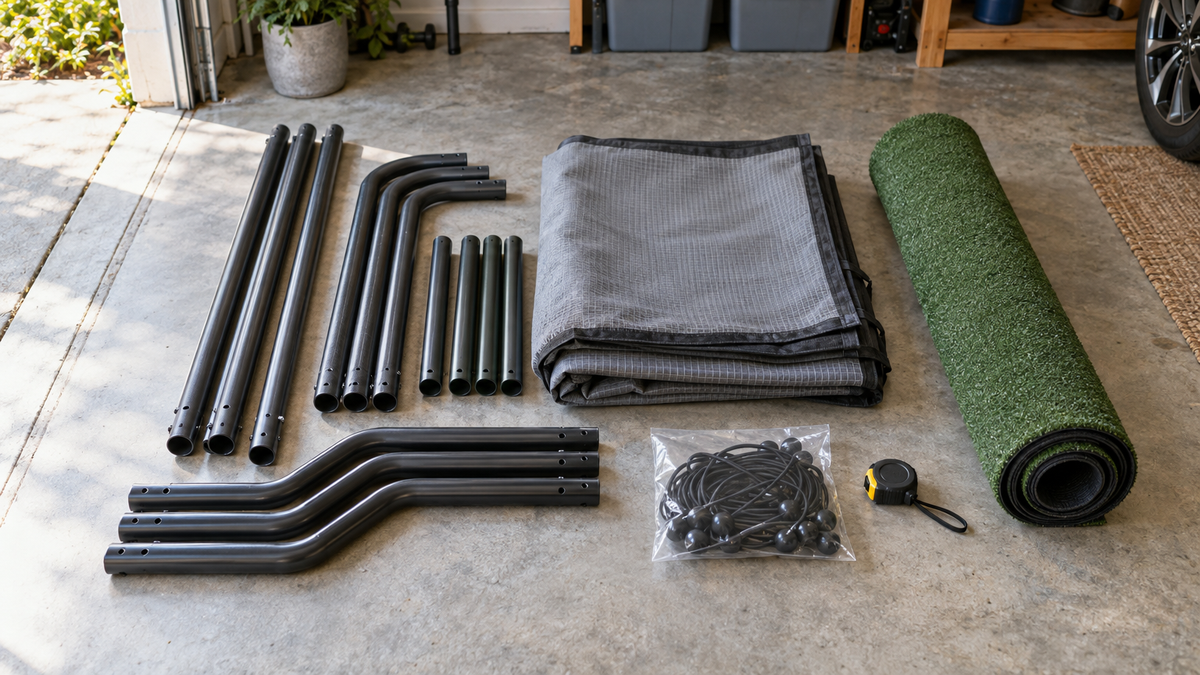
A typical hitting bay frame runs about 10 to 11 feet wide, 8 feet high and 5 feet deep. Every other part you buy, the screen, the side netting, the mat, has to live inside those numbers.
That is why a golf simulator enclosure screen and mat bundle checklist beats shopping three separate carts. Buy the frame first and guess on the rest, and you end up with a screen that sags, a mat that crowds the back wall, or a bottom gap a driver can find. Here is the full parts list, how the pieces size against each other, and the order to buy them.
Why Buy the Enclosure, Screen and Mat as One Bundle
The three parts are not independent. The frame sets the screen size, the screen sets how far back the mat can sit, and the mat decides how much room you have to stand and swing.
Shopping them as a unit also lets you budget by tier instead of pricing three random items. The full-bay parts are a modest share of the total build, since a launch monitor alone can run $3,000 to $25,000+. (Source: PlayBetter; Foresight Sports)
If you want the cleanest starting point, the Carl's Place Complete DIY Golf Bay Package (no launch monitor) is sold from $3,252.70 to $3,717.70 depending on size and options. Prefer to pick the pieces yourself? Keep reading.
Want the frame, screen and mat sized to match out of the box?
Shop the Complete DIY Golf Bay PackageStep 1: Measure the Room Before You Pick a Frame
Start with the room, not the product page. Manufacturer minimums vary a lot: one kit asks for 12 ft wide x 9 ft high x 12 ft deep, another wants at least 11 ft x 16 ft x 9 ft high, and a third lists 8 ft 6 in high x 10.5 ft wide x 18 ft deep.
The pattern is simple. Plan on the room being 1 to 2 feet wider and taller than the frame, plus extra depth for your swing and the launch monitor.
Leave the clearance people forget
One enclosure maker advises at least 1 ft behind the screen and 3 in on each side of the frame. (Source: SimSpace via The Golf Shop Online) Another suggests picking a frame within about 5 cm of your room dimensions so there is still space to assemble it. (Source: GolfBays UK)
Our guide on room size requirements for a 10 foot ceiling walks through the swing clearance side of this in detail.
Step 2: Pick the Frame
You have two honest routes. A pipe frame kit is the budget-friendly path and works well in garages and basements. A full enclosure kit bundles the frame with the screen and hardware so the sizing is already matched.
- Pipe frame only: the Carl's Place DIY Enclosure Pipe Framing Kit runs from $349.95 to $414.95 by size.
- DIY enclosure kit: the Carl's Place DIY Golf Simulator Enclosure Kit is from $999.95 to $1,874.95.
- Pro enclosure kit: the Carl's Place Pro Golf Simulator Enclosure Kit is from $3,409.95 to $5,609.95.
Not sure how the frame mounts in your space? Our breakdown of ceiling mount vs freestanding frames settles that fast.
Step 3: Match the Impact Screen to the Frame
Here is where buyers trip. The screen's visible area is smaller than the frame around it. One 10 ft 10 in frame has a viewable area of about 10 ft wide x 7 ft 7 in high, and an 8 ft frame pairs with a screen about 86.5 in wide. (Source: VXB enclosure listing; Carl's Place kit listing)
So compare screen dimensions, not frame dimensions, and order the size listed for your frame.
We sell three tiers, all in the same size options: the Standard screen from $179.95 to $489.95, the Preferred screen from $298.95 to $774.95, and the Premium screen from $439.95 to $1,119.95. Our Standard vs Preferred vs Premium comparison shows which tier fits your swing speed and room.
Step 4: Choose a Mat That Fits Inside the Bay
The most common mat size is 5 ft x 5 ft (1.5 m x 1.5 m). (Source: SimSpace via The Golf Shop Online; FlightScope SwingBay specs) That sits comfortably inside a 5 ft deep enclosure, but check that it does not crowd the screen, because you still need stance room and a spot for the launch monitor.
The Carl's Place HotShot Golf Mat System is from $499.95 to $1,259.95. Short on width? HotShot Hitting Strips start at $79.95, and our hitting mat sizing guide gives exact dimensions by room.
By the Numbers: What Each Piece Costs and Where It Fits
Market ranges for the individual components are wide. An enclosure with an impact screen runs roughly $1,000 to $6,000, a good screen alone $500 to $3,000, basic netting $300 to $1,000, and a hitting mat $100 to $500+, with quality shock-absorbing mats at $300 to $500. (Source: Foresight Sports; PlayBetter; Carl's Place; Active.com guides)
Full home builds span about $1,000 to $20,000+, and a frugal build with enclosure, screen, launch monitor, projector and mat is possible at roughly $3,000 to $5,000. (Source: PlayBetter; Foresight Sports)
Typical price ranges (midpoint) for hitting-bay components
Source: Midpoints calculated from ranges in Foresight Sports, PlayBetter, Carl's Place and Active.com guides; mat $100-$500, netting $300-$1,000, screen $500-$3,000, enclosure kit $1,000-$6,000
Notice how the frame-plus-screen kit dominates the chart. That is the argument for buying it as a bundle: one decision covers the biggest cost and locks in the sizing.
Sizing the bundle: how each piece must fit
Swipe to compare →
| Component | Typical size / spec | Sizing rule against other pieces |
|---|---|---|
| Room | Min. about 10.5-12 ft W x 8.5-9 ft H x 12-18 ft D (varies by brand) | Measure first; this sets the maximum frame size |
| Enclosure frame | About 10-11 ft W x 8 ft H x 5 ft D | Stay within about 5 cm of room width and leave about 3 in per side and 1 ft behind the screen |
| Impact screen | Viewable area about 10 ft x 7.6 ft on a 10 ft 10 in frame; 86.5 in wide on an 8 ft frame | Buy the size listed for your frame, since the visible area is smaller than the frame |
| Hitting mat | 5 ft x 5 ft (1.5 m x 1.5 m) most common | Must fit inside the 5 ft enclosure depth and leave room for the stance and the launch monitor |
| Side netting, bungees, bottom seal | Sold per enclosure size; basic netting $300-$1,000 | Check that the enclosure kit includes them, otherwise add them to the order |
Step 5: Add the Small Parts Everyone Forgets
This is the row of the table that causes the most return trips to the hardware store. Before you check out, confirm the kit includes each of these, and add what is missing:
- Bungees: 6-inch ball bungees are $0.35 each and 9-inch ball bungees are $0.40 each.
- Side protection: Net Wall Extensions run from $120.00 to $160.00.
- Safety baffle: the DIY Enclosure Safety Baffle is $40.00.
- Zip ties: a 100-pack is $11.99.
Then deal with the bottom edge. Our guide to the bottom gap fix shows how to seal it so no ball escapes. For a deeper look at what kits leave out, read what is included, what is missing, and what to add.
The Order to Buy Everything
- Measure the room. Width, height, depth, plus clearance behind and beside the frame.
- Buy the frame or kit. This locks the footprint everything else follows.
- Order the screen in the size listed for that frame.
- Order the mat once you know your stance depth and where the launch monitor sits.
- Add netting, baffle, bungees and the bottom seal based on what the kit left out.
Want to cost it line by line first? Our enclosure cost to build breakdown lists every item for DIY and pre-made routes. Always check current price on each product page, since they can change.
Want to see the bay together first? The 3D Simulator Builder takes your room size, shows a running total and adds it all to your cart.
Ready to Build the Bay?
Want the bay in one order? See the Complete DIY Golf Bay Package (no launch monitor), or browse all golf simulator packages.
Shop the Gear
Impact Screens we recommend


Not sure which simulator fits your room?
The two-minute 3D Simulator Builder checks your space and budget against every system we carry.

Keep Reading


