
golf simulator
Golf Simulator Basement Conversion Checklist: The 7 Steps to Run Before You Buy Anything
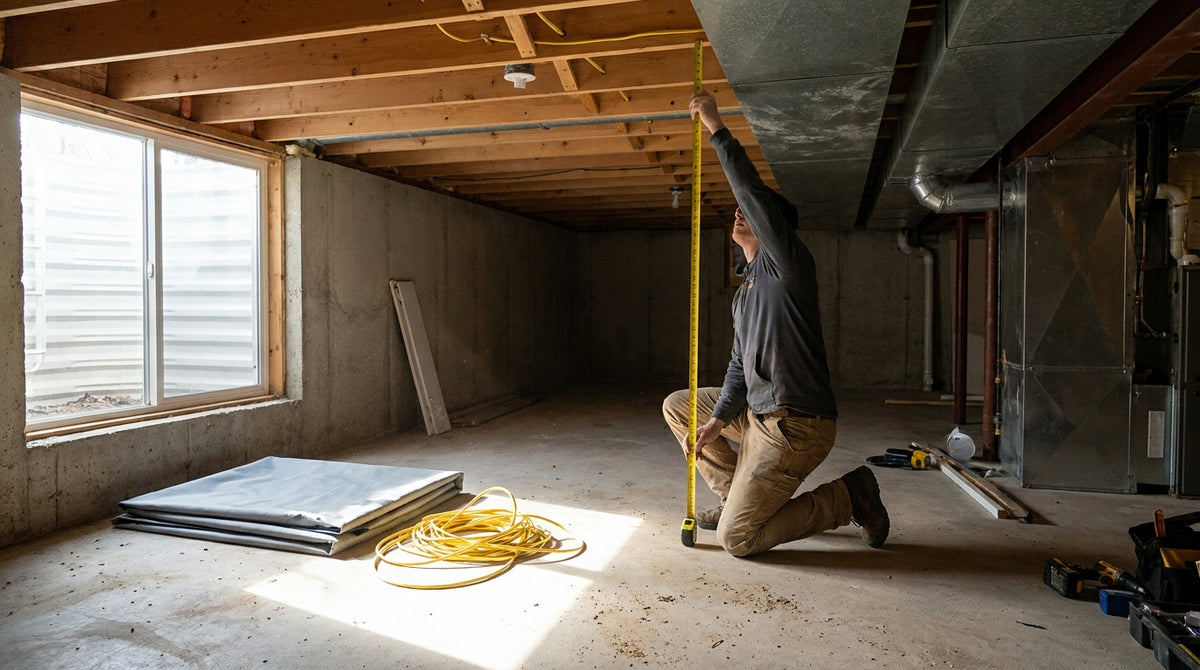
A finished basement measuring 9 ft 2 in from slab to joist gives you roughly 8 ft 4 in of real swing room once the drop-ceiling grid, one duct run and a recessed light are subtracted. That is under the threshold where a driver survives. Standard residential basements deliver only 8 to 9 ft of clear height after joists, tiles, HVAC and fixtures come off the top, while 9 ft is the practical minimum for a full driver swing and 10 ft is what most golfers actually need (Source: Home Performance Lab, Golf Simulator Room Requirements 2026, and IndoorGolfDesign.com). So this golf simulator basement conversion checklist runs in a specific order, and step one is a tape measure, not a shopping cart. Every line item after it depends on the number you get.
Step 1: Measure the ceiling you actually have, not the joist
Put the tape on the finished floor and run it to the lowest thing above your hitting position. Not the joist bay. The lowest thing: duct, sprinkler pipe, can light, drop-tile grid, the beam nobody remembers framing.
Then measure yourself. Golfers under 5 ft 6 in can sometimes work at 8.5 ft with irons and wedges only, but players over 6 ft should target 10 to 11 ft of clearance to avoid altering the swing or clipping a ceiling-mounted launch monitor (Source: Golfers Authority, Golf Simulator Ceiling Height Requirements).
The honest version of this step: swing a driver in the space with a friend watching the clubhead. If it comes within a few inches of anything, you are building an iron bay, and that is a fine build — it just changes the screen height and the enclosure you order. Our ceiling height breakdown for garage builds walks the same math with real frame dimensions.
Step 2: Confirm bay width and depth in three zones
Depth is where basements quietly fail, because a long finished room is usually long in the wrong direction. Break it into three named zones and measure each one rather than eyeballing whether the room feels big enough.
The three depth zones
Roughly 1 ft behind the screen for the air gap, 10 to 12 ft from screen to ball, and about 7 ft behind the ball for your backswing and body. The comfort benchmark for a dedicated bay is 14 ft wide by 18 ft deep with 10 ft ceilings; the workable minimum is about 10 ft wide by 15 ft deep (Source: Carl's Place and TruGolf room dimension guides).
Width matters for a reason people forget: you need room to stand on the correct side of the ball. A 10 ft wide bay works for one right-handed golfer. Two-handed households want 12 ft or more.
Odd basement dimensions, finished walls, no margin for error?
The Carl's Place DIY Golf Simulator Enclosure Kit is where most basement conversions start. Pipe frame plus impact screen, sized to your exact ceiling height and bay width, from $999.95.
Shop the DIY Enclosure KitWhat the data says about basement bay dimensions
Here is the whole sizing argument in one picture. Minimums are survivable. The recommended column is what people who rebuild their bay a second time end up at.
Golf Simulator Bay Dimensions: Minimum vs. Recommended (feet)
Source: Compiled from Carl's Place, TruGolf, Home Performance Lab and IndoorGolfDesign room-size guides (2026)
Step 3: Decide the mat and subfloor before the ceiling
This one surprises people, because a mat sounds like a comfort choice. In a basement it is a joint-health choice, and it changes your ceiling number.
Hitting mats should carry a minimum of 1.5 inches of thickness for adequate shock absorption on concrete, with premium multi-layer mats running 2 to 3 inches; mats under 20 mm on concrete transmit enough impact energy to cause cumulative joint damage over weeks of regular practice (Source: Home Performance Lab, Best Hitting Mat for Golf Simulator 2026, and Simply Golf Simulators).
Now do the subtraction. A 2 in mat plus a 0.5 in tile base raises your stance 2.5 inches, so the 9 ft 2 in room becomes an 8 ft 11.5 in room. Measure ceiling clearance standing on the mat you intend to buy, not on bare slab.
Step 4: Plan how the frame anchors into finished space
Basements give you two good anchor surfaces and one bad one. Joists overhead are excellent. Poured concrete walls are excellent with the right anchor. Drywall over studs on a furred-out wall is where screens end up sagging in year two.
Find your joist direction first — a frame that wants to hang across the joists is a much easier install than one that runs parallel between two of them. If you are tying into block or poured wall, our concrete wall anchor guide covers which fasteners actually hold under repeated impact.
Basements also come with a humidity problem that garages do not. Plan for a dehumidifier in the bay from day one — basement screen humidity and mold prevention explains why a screen in a damp room ages faster than the same screen in a dry one.
Step 5: Pull power and set the projector mount before drywall
Home simulator bays need a projector in the 3,000 to 4,000 lumen range at minimum, with 5,000 to 6,000 lumen laser models for rooms with windows, and a short-throw ratio between 0.69 and 0.89 for most ceiling-mounted setups (Source: Home Performance Lab projector placement guide 2026 and BenQ golf simulator projector resources). Basements are usually dark, which is the one place a basement wins outright — 3,000 lumens genuinely works down there.
On the electrical side, a 20-amp 120-volt circuit supplies roughly 2,400 watts, enough headroom for a simulator projector plus PC, launch monitor and lighting on a single dedicated run (Source: Jackery projector power reference; Audioholics home theater circuit discussion). One dedicated 20A circuit is the practical spec, and it costs a fraction of what it costs to pull after the drywall is up.
Mark the projector mount location on the joist while the joist is still visible. Cheapest fifteen minutes of the entire build.
Step 6: Handle egress, doors and the boring stuff
Check your egress window before you frame a screen wall in front of it. Check the door swing. Check whether the bay blocks access to the panel, the furnace filter or the water shutoff, because you will be back at all three.
Low soffits along one edge are usually fine if they sit behind the hitting position rather than above it.
Step 7: Build the line-item budget
Golf simulator setups span $2,000 to $70,000, with entry-level at $1,000 to $3,000 and mid-range at $3,000 to $10,000; most homeowners land between $12,000 and $20,000 for a build they still like in five years (Source: ShopIndoorGolf, Golf Simulator Cost in 2026; Northcourse Golf home simulator cost guide). The room is a separate budget line: finishing a basement runs $7 to $23 per square foot at the low end, with contractor-led standard finishes at $30 to $75 per square foot (Source: Angi, How Much Does It Cost to Finish a Basement, 2026 Data).
Basement Golf Bay: Line-Item Budget Ranges by Tier
Swipe to compare →
| Line item | Budget build | Mid-range build | Premium build |
|---|---|---|---|
| Launch monitor | FlightScope Mevo Gen2 $1,299.00 | SkyTrak Max $1,695.00 or Uneekor EYE MINI $2,999.00 | Uneekor XO2 from $10,999.00 |
| Enclosure frame + impact screen | DIY Enclosure Kit from $999.95 | DIY kit plus Premium screen from $439.95 | Pro Enclosure Kit from $3,409.95 |
| Hitting mat (1.5 in minimum on slab) | HotShot Hitting Strips from $79.95 | HotShot Golf Mat System from $499.95 | HotShot Mat Base from $425.00 plus full mat system |
| Projector | BenQ TH671ST $949.00 | BenQ AH30ST $1,499.00 | BenQ LK830ST 4K laser $2,499.00 |
| Room finish and electrical (250 sq ft bay) | $1,750 to $5,750 at $7 to $23 per sq ft | $7,500 to $12,000 at $30 to $48 per sq ft | $12,000 to $18,750 at $48 to $75 per sq ft |
| Typical all-in total | About $5,000 to $9,000 | About $14,000 to $19,000 | About $30,000 and up |
Notice which half is bigger. In most basement conversions the equipment outruns the construction, which is the opposite of what people assume when they start pricing drywall. If you want the same exercise for a different room, the garage build cost breakdown lines up tier for tier.
Run the list in order
Ceiling, then dimensions, then mat, then anchoring, then power, then egress, then budget. Skip to the budget first and you will buy a frame that does not fit the room you have.
Once you have your finished-ceiling number and your bay width, you can order a screen that fits on the first try instead of the second. Check current sizes and pricing across the full range in our golf impact screen collection, and send us your three measurements if you want a second set of eyes before you order.


Not sure which simulator fits your room?
The two-minute Simulator Finder Quiz checks your space and budget against every system we carry.

Keep Reading
Related guides

DIY golf simulatorGolf Simulator Garage Build Cost Breakdown: Every Line Item at Three Budget Tiers

enclosure frame heightGolf Simulator Ceiling Height Requirements for a Garage Build: The Real Numbers Before You Buy a Frame

diy golf simulator enclosure frame cost breakdownDIY Golf Simulator Enclosure Frame Cost Breakdown: Line-Item Budgets at $1.5k, $3k, and $5k