
corner setup
Golf Simulator Impact Screen for a Corner Setup: How to Angle It Without Wrecking Your Bounce-Back
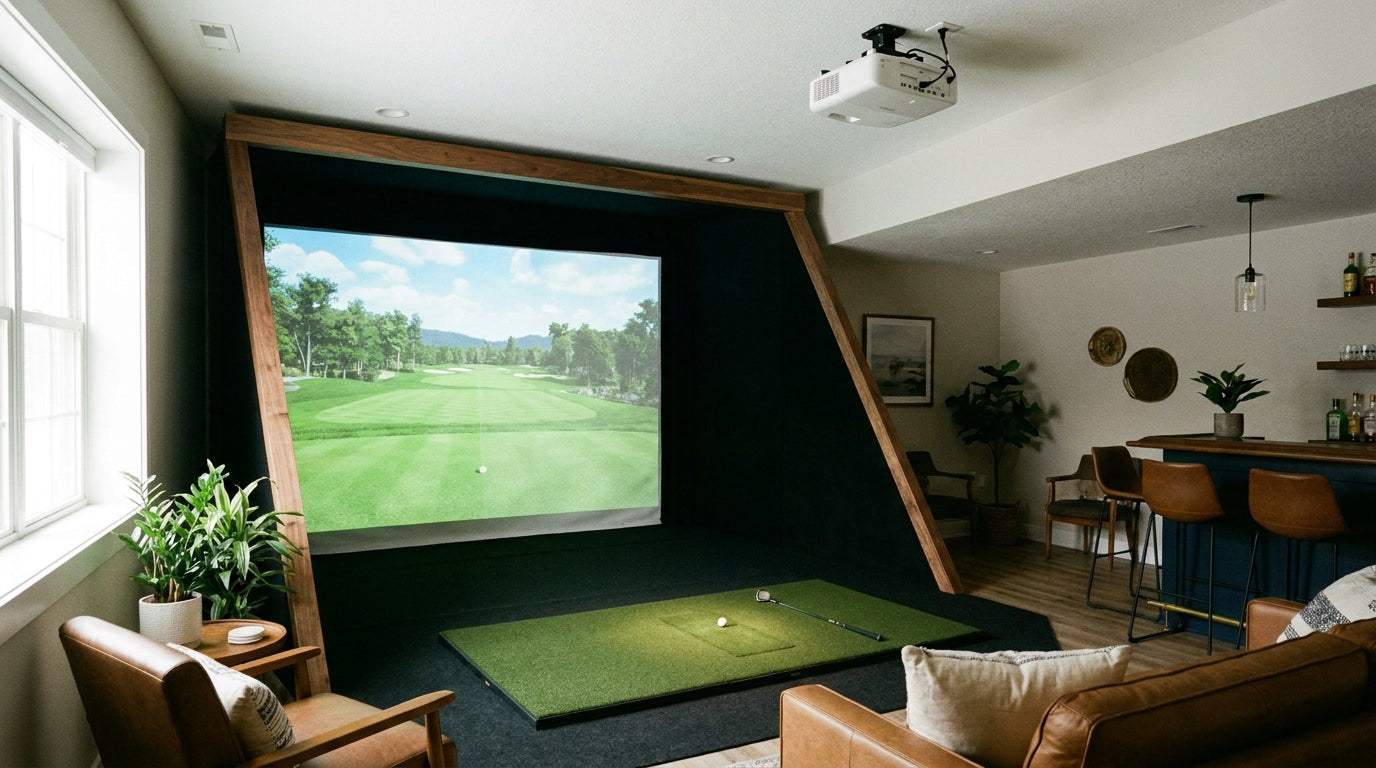
Here's a number that reframes the whole corner-screen debate: every major impact screen brand — Carl's Place, SIGPRO, OptiShot — rates its fabric to survive ball speeds of 250 MPH or higher, while the PGA Tour average is roughly 175 MPH and most of us swing 130–150 MPH (Source: GolfingSim / Shop Indoor Golf (SIGPRO) impact screen ratings). Translation: the screen fabric is never your problem in a corner. The geometry around it is.
If your room is too narrow for a flat wall, angling a golf simulator impact screen for a corner setup can reclaim the width you need. But corners break three things at once — your behind-screen buffer, your bounce-back path, and your projector alignment. Let's walk through what actually holds up and what forces you back to a flat wall.
Why Golfers Angle a Screen Into a Corner
The math is simple. A flat wall gives you the wall's width. A diagonal line across a corner gives you the room's hypotenuse — noticeably more.
That matters because the minimum workable sim room is about 10 ft wide, 12–15 ft deep, and 9 ft tall, but a centered tee that works for both righties and lefties really wants around 14 ft of width (Source: Shop Indoor Golf / TruGolf room dimension guides). If your wall is only 11 or 12 feet, running the screen corner-to-corner is often the only way to hit that 14-foot diagonal.
So the appeal is real. The catch is that you don't get the extra width for free — you pay for it in depth clearance and projector angle.
Sizing a screen to fit an odd corner? Start with a properly tensioned fixed-frame screen cut to your dimensions.
Shop Impact Screens & Frames →The Real Constraint: Buffer Space Behind the Screen
Impact screens don't stop a ball dead — they flex and absorb it. To do that safely, they need room to move.
The rule of thumb is a minimum 12-inch buffer behind the screen, with 16 inches recommended, so the fabric can travel back and dissipate the force (Source: Home Performance Lab / Shop Indoor Golf setup guides). On a flat wall that's easy — you just hold the frame off the wall.
In a corner, that buffer gets attacked from both sides. The diagonal screen wants clearance behind it, but the two walls forming the corner keep crowding in on the ends of the frame. The center of your screen might have 16 inches of breathing room while the edges have four. That uneven gap is the single hardest thing to solve at an angle, and it's why a corner build almost always needs a custom-depth frame rather than an off-the-shelf kit. If you're weighing structure, our roll-up vs fixed-frame breakdown explains why serious corner builders default to a rigid frame every time.
Bounce-Back Geometry Gets Weird at an Angle
On a well-installed flat screen, a ball rebounds a tame 1–2 feet — one common spec lists 1.8 ft (about 0.5 m) of rebound (Source: Precision Sports Sim / Canvas ETC impact screen guides). The ball comes back roughly the way it went in: toward you, low and slow.
Angle that screen and the rebound angle changes with it. A shot that hits an angled surface can redirect sideways — toward a side wall, a shelf, or worse, back across the hitting area at an offset. The safety concern in a corner isn't the ball speed the fabric absorbs; it's where the leftover energy goes.
The fix is keeping your screen's angle modest and your tee position squared to the screen, not the room. It's worth reading up on how far balls really rebound before you lock in a corner layout, because the redirect is easy to underestimate on paper.
What the Data Says
Here's where the numbers set your hard limits. Nail these and a corner works; miss them and you'll be reinstalling.
Recommended Clearances & Distances for a Safe Impact Screen Setup (inches)
Source: Home Performance Lab, Precision Sports Sim, Shop Indoor Golf setup guides (bounce-back ~1.8 ft = 21 in; ideal tee-to-screen 10 ft = 120 in)
Two more numbers decide whether the corner is even viable. First, projector geometry: the optimal throw ratio sits around 0.8:1, and keystone correction should stay within about 15° before image sharpness visibly falls apart (Source: BenQ / My Golf Simulator / Home Performance Lab projector guides). An angled screen forces off-axis projection, and blowing past that 15° limit is exactly where a flat wall starts earning its extra footprint.
Second, cost: a custom fixed frame cut for corner dimensions runs more than a flat-wall kit — figure roughly $1,000 for a DIY EMT-conduit build up to $3,000+ for premium fixed-frame systems (Source: Rain or Shine Golf / Elite Screens / Shop Indoor Golf pricing). That premium is the price of the width you're reclaiming.
Pick the Right Fabric for an Angled Frame
Because a corner screen is harder to tension perfectly flat, fabric choice matters more than it does on a clean flat wall. Thicker, heavier material is more forgiving.
Most impact screens run 1mm to 3mm thick. Premium 3mm fabrics (13–18 oz) cut bounce-back and noise but can show texture, while thinner 8–12 oz screens give smoother images and wear faster (Source: Canvas ETC "Golf Impact Screen Durability"). For a corner, lean heavy.
Impact Screen Fabric Tiers: Thickness vs. Performance Trade-offs
Swipe to compare →
| Screen Tier (weight) | Approx. Thickness | Bounce-Back / Image Trade-off |
|---|---|---|
| Thin (8–12 oz) | 1–1.5 mm | Smoothest projected image but more bounce-back and faster wear |
| Standard (12–13 oz) | ~1.5–2 mm | Balanced image and durability; common residential choice |
| Premium multi-layer (13–18 oz) | ~3 mm | Lowest bounce-back and noise, best for angled corner frames, but can show texture |
| All major brands (rated) | N/A | Rated to 250 MPH ball speed vs. ~175 MPH PGA Tour average |
When a Flat Wall Is Worth the Extra Footprint
Angle a screen into a corner when width is your only shortage and depth is plentiful — a wide-but-shallow room, or a garage where the door dictates the layout. In those rooms the diagonal is a genuine unlock.
Go flat when your projector would need more than ~15° of keystone, when you can't guarantee at least a 12-inch buffer along the whole frame, or when the sideways rebound path points at anything breakable. A flat wall is cheaper, tensions perfectly, and keeps your bounce-back predictable.
If you can steal even a foot of depth, mounting a flat screen slightly off the corner usually beats a true diagonal. Our guide on how much gap to leave behind the screen shows how little space that buffer actually needs.
The Bottom Line
A corner setup is a trade: you buy diagonal width and pay in buffer clearance, rebound complexity, and projector angle. The fabric itself is bulletproof — rated to 250 MPH against your 140 — so the decision comes down to geometry, not the screen.
If the corner math works for your room, don't improvise it. A fixed-frame screen sized to your exact corner dimensions, in a heavier 3mm fabric, is the setup that stays tight and safe for years.
Browse our impact screens and fixed frames → and size one to your corner before you commit to the drill holes.
Not sure which simulator fits your room?
The two-minute Simulator Finder Quiz checks your space and budget against every system we carry.


Keep Reading


