
golf simulator
Golf Impact Screen Grommet vs Bungee Attachment: Which Edge System Hangs Flatter?
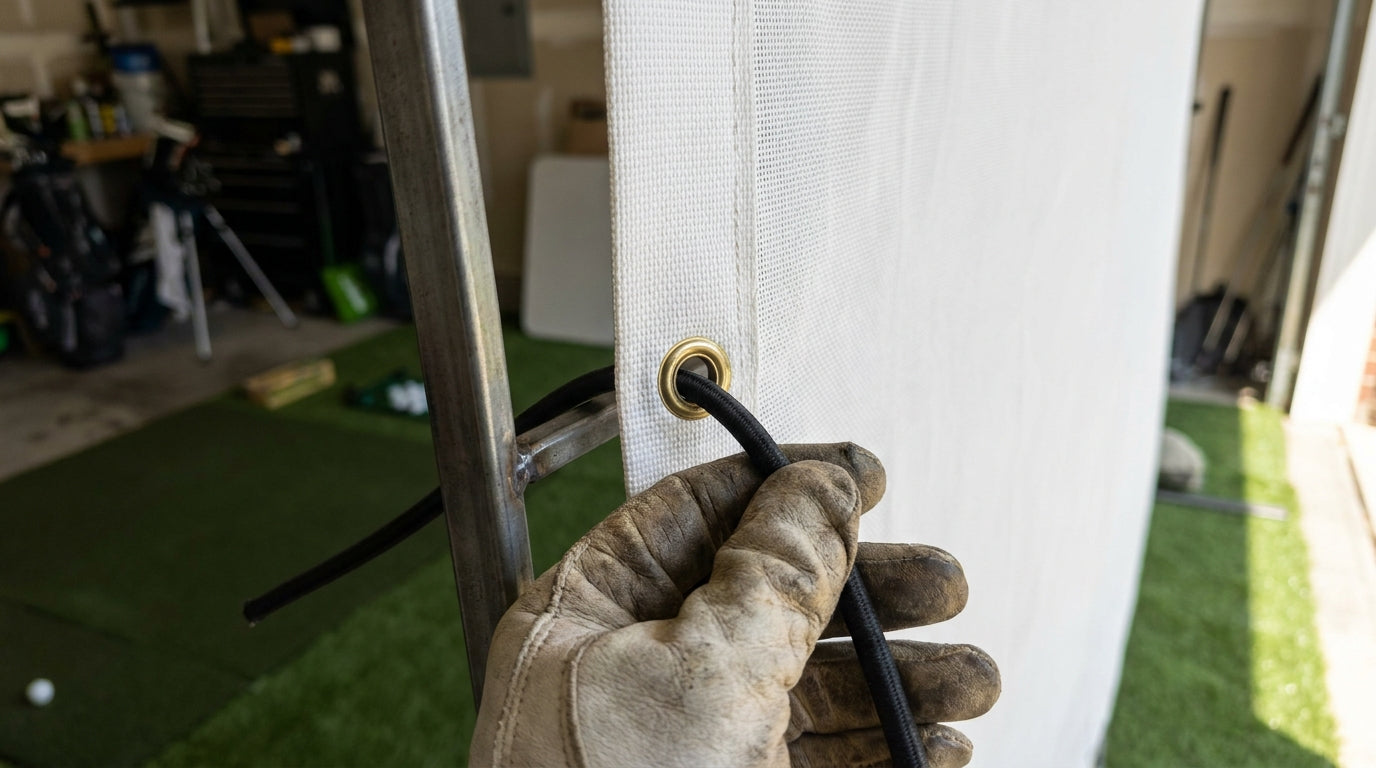
Here's the detail almost nobody thinks about until their image looks wavy: the edge of your screen matters as much as the fabric in the middle. A premium multi-layer impact screen can rate a 9 or 10 out of 10 for image quality — but only when it's mounted under proper, even tension with no wrinkles, ripples, or sag (Source: Golfbays screen performance ratings, 1–10 scale). Get the edge attachment wrong and that same screen looks like a bedsheet in a breeze.
So when you're deciding how to actually hang the thing, the real question is grommet-and-bungee versus a continuous loop or fixed-fastener system. Both work. They just fail — and succeed — in different ways.
The Two Ways to Hang a Screen
Grommet-and-bungee is the classic DIY method. Reinforced grommets are sewn into the Velcro-backed edges of the screen every 12 inches, and you thread a 3/16-inch diameter, 10-inch-long bungee cord through each one and anchor it to your frame (Source: Canvas ETC DIY Golf Impact Screen & Enclosure Guide, and Ace Indoor Golf). The elastic does the work, pulling the edge taut while still giving under impact.
Building one now? Carl’s Place Preferred impact screen — from $299.
The continuous-loop or fixed-hook approach spreads the load along the whole edge instead of at points. Think of the difference between hanging a hammock from two carabiners versus lacing it to a rail every inch. One concentrates stress; the other distributes it.
What the Data Says
The numbers behind these systems are more specific than most people expect — and they explain why grommets are engineered the way they are.
Those grommets aren't just holes. They use a 1/2-inch hole with a 1-inch flange diameter specifically to add strength and stop the screen from tearing at the attachment points (Source: Canvas ETC / Carl's Place assembly documentation). That oversized flange is the main defense against the localized stress that eventually rips cheaper screens.
Tension has a target, too. You've got it right when there's roughly a 2–3 inch (5–7.5 cm) gap left and right of the screen, and the center can flex back about 25 cm when you push it by hand (Source: Golfbays Impact Screen FAQs & Guidance). That's a measurable spec, not a vibe.
And the reason flex matters so much: impact screens absorb balls traveling over 180 mph and up to roughly 250 mph, with manufacturers recommending at least 12 inches of clearance behind the screen so it can flex safely (Source: My Golf Simulator, How to Hang a Golf Impact Screen). Rigid hooks concentrate that energy at each anchor. Elastic bungees dissipate it across the whole edge — which is exactly why swapping bungees for fixed hooks puts extra stress on the grommets and raises the chance of tearing (Source: My Golf Simulator).
Relative Cost of Golf Impact Screen Attachment Methods
Source: Canvas ETC DIY Golf Impact Screen & Enclosure cost comparison
As the chart shows, grommet-and-bungee is the cheapest way in — tied with basic tarp clips at the low tier — while sleeved, aluminum-bar, and retractable systems climb into the high-cost bracket. That cost gap is a big part of why DIY builders lean bungee.
Ready to skip the guesswork and hang a screen built for even tension?
Shop Impact ScreensGrommet-and-Bungee vs Continuous Loop, Side by Side
Here's the honest tradeoff. Grommets are cheap, forgiving, and flex beautifully under a fast ball — but they can "wave" between attachment points if you rush the tensioning. Continuous-loop and hook-fastener systems give you a flatter edge out of the box, but cost more and transfer more shock to the fabric.
Grommet-and-Bungee vs Continuous-Loop / Fixed-Fastener Attachment
Swipe to compare →
| Attribute | Grommet & Bungee | Continuous Loop / Fixed Hook |
|---|---|---|
| Typical cost tier | Low | Medium–High |
| Edge spacing / attach points | Grommet every 12 in | Continuous along edge |
| Tension evenness | Good, but can 'wave' between grommets | Very even, distributed load |
| Ripple prevention | Needs careful corner-first sequencing | Inherently flatter edge |
| Tear / stress risk | Concentrated at grommets (1" flange guards) | Low (load spread out) |
| Flex under 180–250 mph impact | High (elastic absorbs energy) | Lower (rigid fasteners transfer stress) |
| Best suited for | DIY frames (angle iron, pipe) | Prebuilt / commercial enclosures |
Killing the Ripple: It's All in the Sequence
The wave that gives grommet systems a bad name isn't the grommet's fault — it's the order you tension in. There's a proven ripple-free technique: anchor a 10-inch bungee about 8 inches below the grommet, thread it through, then anchor about 8 inches above it, so the cord pulls at an angle rather than straight out (Source: Canvas ETC / Golf Simulator Forum, Grommets vs Clips).
Then work the corners first, hit the side midpoints next, and fan outward evenly from there. That sequence is what stops the fabric from bunching between anchor points. Skip it and you'll chase waves all night.
If you're already fighting shipping creases on top of tension issues, our guide on how to remove golf impact screen wrinkles pairs perfectly with getting the edges right. And for a deeper dive on dialing in the pull, the impact screen tensioning system guide walks through the whole process.
Which Method Fits Your Build?
If you're building a frame yourself out of angle iron, EMT conduit, or black pipe, grommet-and-bungee is almost always the move. It's the cheapest, it forgives an imperfect frame, and that elastic flex is genuinely protective when a driver ball slams the screen at 250 mph. The 1-inch flange guards the attachment points, and the bungees do the rest.
If you're ordering a prebuilt or commercial enclosure, a continuous-loop or sleeve system often comes integrated — and you're paying for that flatter edge and cleaner install. It's not better or worse; it's a different priority. Buyers weighing homemade against retail should read DIY golf impact screen vs store bought before committing either way.
Bottom line: for most home builders, grommet-and-bungee wins on cost and impact safety, as long as you respect the tensioning sequence. Continuous-loop earns its premium when you want a flat edge with zero fuss and you've got the enclosure to match.
The Takeaway
Your attachment method decides whether that 9–10/10 screen actually looks like one. Match the system to your frame, tension corners-first, leave your 12 inches of clearance, and the edge disappears into a flat, bright image.
Ready to build it right? Browse our golf impact screens — with reinforced grommet edges engineered for even, ripple-free tension.


Not sure which simulator fits your room?
The two-minute Simulator Finder Quiz checks your space and budget against every system we carry.

Keep Reading
Related guides

golf simulatorGolf Simulator Hitting Mat Sizing Guide: Exact Dimensions for 10x12, 12x15, and 16x18 Rooms

golf simulatorGolf Simulator Enclosure Cost to Build: Every Line Item, DIY vs Pre-Made (2026 Numbers)

golf simulatorGolf Simulator Room Electrical Plan: Where Every Outlet Goes Before the Frame Closes Up