golf simulator
Golf Simulator Impact Screen Attachment System Guide: Every Method Ranked (And Which One Your Setup Actually Needs)
Most people spend hours researching screen material and projector specs. Then they spend about five minutes deciding how to attach the screen to the frame — and that's exactly where builds start falling apart. Grommet tears, saggy screens, image distortion from uneven tension: almost all of it traces back to attachment hardware decisions that didn't match the screen size, frame type, or how hard the owner actually swings.
The global golf simulator market hit $2.32 billion in 2024 and is on track to reach $4.61 billion by 2034. (Source: Fortune Business Insights / Polaris Market Research) Most of that growth is residential — and in home setups, you're the one choosing the hardware. This golf simulator impact screen attachment system guide covers every method in current use, what each one does well, where it fails, and exactly which system belongs on your specific build.
The Five Attachment Methods You'll Encounter
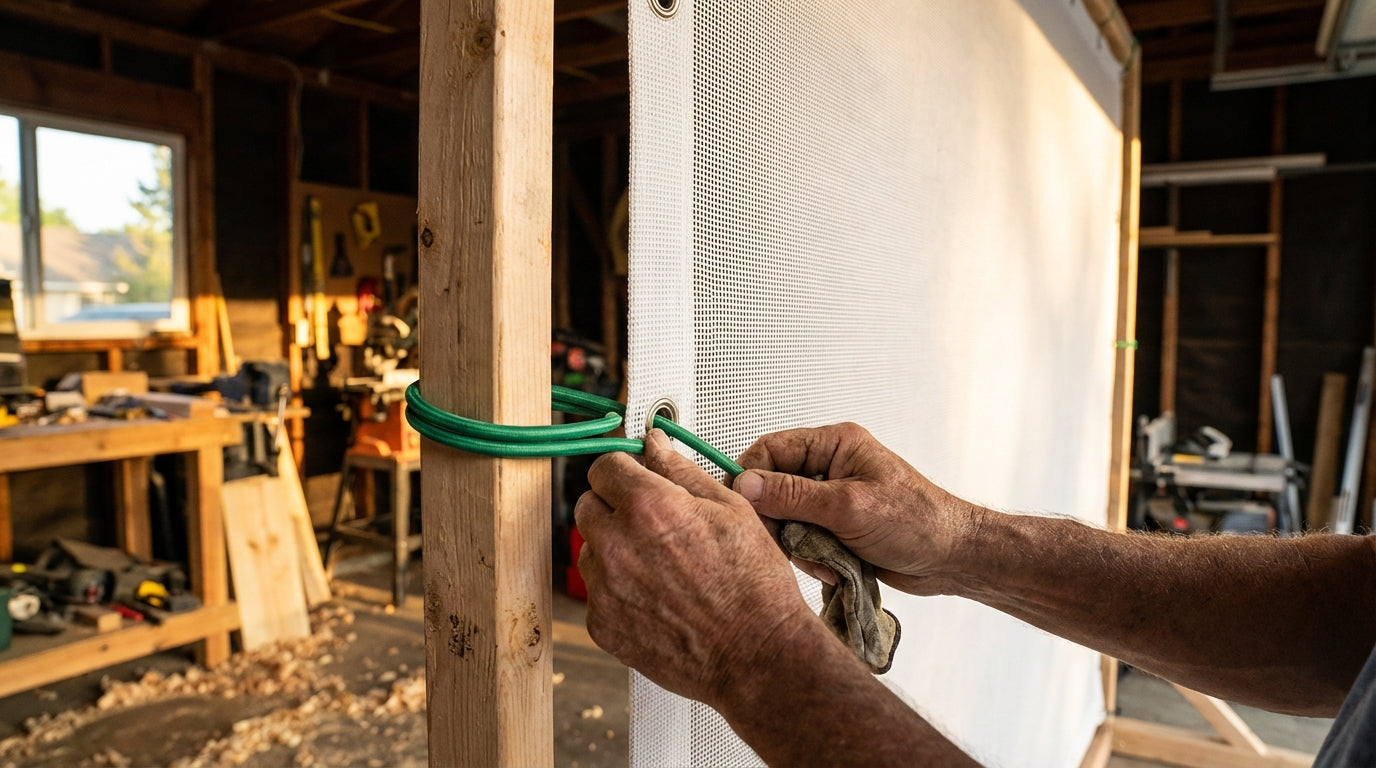
Grommets + Ball Bungees
The most common DIY setup by a wide margin. Reinforced grommets are sewn into the screen perimeter, and ball bungees — elastic loops with rubber balls on each end — hook onto each grommet and loop around the frame. Adjustable, forgiving, and works with both wood and EMT pipe frames.
The catch: spacing matters more than people realize. Bungees should be placed every 8–12 inches along the full perimeter. (Source: Canvas ETC Golf Impact Screen Installation Guide) Go wider and the load concentrates at individual grommets — exactly how you end up with a torn screen edge after a few months of full-speed driver swings.
Sleeve & Strap Systems
A significant step up from grommets. The screen hem is sewn around a wide fabric sleeve that slips over a PVC or aluminum pipe running across the top of the frame. All tensioning force transfers to that pipe — not the screen fabric itself. (Source: Spectrum Golf Screen Guide / My Golf Simulator)
This is the right call for large screens (12×9 ft and up) and permanent builds. Less adjustable than bungees, but it outlasts them by a wide margin on high-use setups because the primary failure point — grommet stress — is completely eliminated.
Carabiners and S-Hooks
Used in place of ball bungees on grommet-based screens. Carabiners let you fine-tune tension at each individual attachment point, which is useful on medium-sized screens where you want to dial in flatness precisely. They're more rigid than bungees, though — over-tighten and you'll see the screen bow or image distortion appear along the edges.
Tarp Clips
No grommets required. Edge gripper clips bite onto the screen hem and accept a bungee or cord on the other end. Ideal for temporary setups or screens that didn't ship with grommets. Not appropriate for permanent high-swing-speed use — the clips can shift under sustained tension from repeated full-swing ball strikes.
Zip Ties and String
Last resort only. They work for a test fit, not a permanent install. Zip ties don't flex — a 100 mph driver transmits shock directly to the grommet and starts tearing the hem in weeks. If this is what's holding your screen right now, replace it before your next session.
The Two Installation Variables That Matter More Than the Hardware
Your hardware choice matters, but two installation numbers determine whether any attachment system actually holds up long-term.
Bungee Spacing
Place bungees every 8–12 inches along the full screen perimeter. Wider spacing creates load concentration at each grommet — like picking up a hammock by two points instead of twenty. The hem tears, the grommet pulls through, and you're shopping for a replacement screen. (Source: Canvas ETC Golf Impact Screen Installation Guide)
Wall Clearance Behind the Screen
You need at minimum 12–16 inches between the back of the screen and the wall behind it. (Source: Virtual Golf Simulator / Spectrum Golf Screen Guide) Without that gap, the screen can't flex and absorb impact energy on the ball strike. Instead, the attachment hardware absorbs it — which accelerates grommet wear and increases ball rebound. If you're tight on depth in your bay, the frame anchoring guide covers how to push the frame forward a few inches without destabilizing the whole build.
By the Numbers
- Premium polyester-blend impact screens are rated to withstand 10,000+ ball impacts at speeds exceeding 180 mph. Budget single-layer screens can develop holes within months of regular full-speed play. (Source: Canvas ETC Golf Impact Screen Durability Guide)
- Sleeve-and-strap systems transfer all tensioning force to an internal PVC pipe rather than the screen fabric — eliminating the primary failure point of grommet-based setups entirely. (Source: Spectrum Golf Screen Guide / My Golf Simulator)
- North America holds 46.6% of global golf simulator market share as of 2025, with residential installs as the fastest-growing segment. (Source: GM Insights Golf Simulator Market Report 2025) Home builders are choosing these attachment systems — and most make the call once, without a second chance to get it right.
- Proper bungee spacing (every 8–12 in.) is the single most impactful installation variable in preventing premature grommet failure and screen edge tearing. (Source: Canvas ETC Golf Impact Screen Installation Guide)
Golf Simulator Screen Attachment Method Ratings (1–10 Scale)
Source: Industry estimates based on Canvas ETC, Spectrum Golf, My Golf Simulator, and Golf Simulator Forum community guidance
What the Scores Actually Mean
Each method was rated 1–10 across four factors: durability under sustained use, adjustability, image flatness, and installation ease. Sleeve-and-strap leads because it scores consistently well on all four. Bungee and grommet systems rank second — excellent adjustability and easy to set up, but durability trails on larger screens under sustained high swing speeds. Tarp clips and zip ties are functional in specific narrow contexts but shouldn't be the foundation of a permanent bay.
If you're already seeing sag or tension issues showing up as visible creases, the impact screen wrinkle fix guide walks through diagnosing and correcting the problem — without pulling the whole screen down and starting from scratch.
Recommendation Matrix: Match Your Setup to the Right System
Use this table to match your screen dimensions and frame material to the correct attachment method for your specific build.
Impact Screen Attachment Recommendation Matrix by Screen Size & Frame Type
Swipe to compare →
| Screen Size | Frame Type | Recommended Attachment | Notes |
|---|---|---|---|
| Small (≤9×7 ft) | Wood 2×4 frame | Grommets + ball bungees | Low tension needs; bungees every 10–12 in. adequate |
| Small (≤9×7 ft) | EMT pipe frame | Grommets + ball bungees | Leave 2–3 in. gap between screen edge and pipe for bungee travel |
| Medium (10×8 ft) | Wood 2×4 frame | Grommets + bungees or carabiners | Carabiners allow fine tension adjustment at each attachment point |
| Medium (10×8 ft) | EMT pipe frame | Grommets + bungees | Space bungees every 8–10 in.; check grommet wear every 6 months |
| Large (12×9 ft+) | Wood 2×4 frame | Sleeve & strap system | Distributes load to PVC pipe sleeve, not screen fabric; best for permanent rooms |
| Large (12×9 ft+) | EMT pipe frame | Sleeve & strap or aluminum bar hem | Aluminum bar hem provides near-zero point-load stress across full screen width |
| Any size | Temporary / portable | Tarp clips + bungees | No grommets required; repositionable but not suitable for high-swing-speed use |
| Any size | Retractable frame | Loop fasteners / hook-and-loop straps | Enables fast screen removal; lower sustained tension than bungee systems |
Building for the Long Term
Large Permanent Screens: Go Sleeve-and-Strap
For 12×9 ft or larger screens in a dedicated sim room, sleeve-and-strap is the clear choice. You'll pay more upfront than bungees, but you won't be chasing grommet wear or re-tensioning every few months. If you want even more rigidity, an aluminum bar hem distributes load across the full screen width with near-zero point stress — it just requires more precise frame tolerances to install properly.
Portable and Multi-Use Setups: Tarp Clips Work
If the screen needs to come down regularly, tarp clips with bungees are the practical answer. No permanent modifications to the screen, and the whole thing breaks down in under ten minutes. The tradeoff is lower sustained tension — fine for recreational swing speeds, less appropriate if you're consistently hitting 100+ mph driver shots in your sessions.
Make Sure the Screen Can Keep Up
No attachment system compensates for an underpowered screen. Sleeve-and-strap on a budget single-layer screen still leaves you with holes in six months. Match the attachment method to the screen tier — bungees for mid-range polyester builds, sleeve-and-strap for premium dual-layer screens rated to 10,000+ impacts. The screen material durability comparison breaks down exactly which tier handles your swing speed.
When you're ready to pair the right attachment system with the right screen, browse the Carl's Place impact screens at GolfingSim's impact screen collection — every option ships with reinforced grommets sized for the attachment hardware that fits your frame build.
Not sure which simulator fits your room?
The two-minute Simulator Finder Quiz checks your space and budget against every system we carry.


Keep Reading
Related guides

golf simulatorGolf Impact Screen Max Ball Speed Rating: What Your Screen Really Survives at 110+ MPH

corner setupGolf Simulator Impact Screen for a Corner Setup: How to Angle It Without Wrecking Your Bounce-Back

golf simulatorGolf Simulator Impact Screen for a Shed: How to Size, Hang, and Tension It Right