
best LED lighting for golf simulator room
Best LED Lighting for a Golf Simulator Room: Color Temp, Placement, and Dimmer Tips
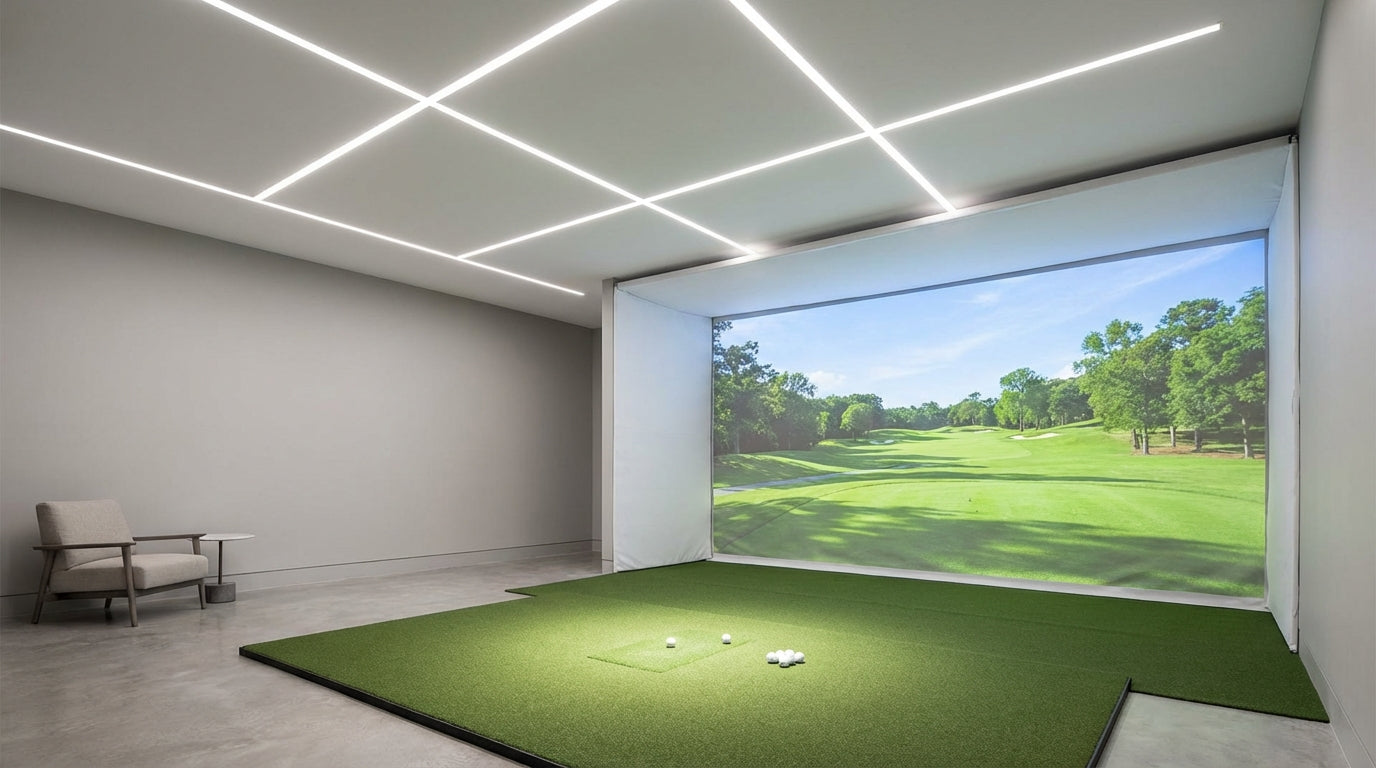
Here's something most simulator builders find out the hard way: you can spend $800 on a high-lumen projector and still end up with a washed-out, muddy image on your impact screen. Not because the projector is bad. Because your room lighting is fighting it.
A projector needs roughly 2–3× more lumens when used in a moderately lit room compared to a fully dark one — jumping from ~1,500 lumens to 3,500–4,000 ANSI lumens just to maintain image clarity on a 100–120" screen. (Source: BenQ Projector Brightness Guide / ProjectorScreen.com) That multiplier is why your lighting setup isn't an afterthought. It's a core build decision that determines how good your image will ever look.
The good news: the answer isn't "make the room pitch black." It's designing your lighting intentionally — right color temperature, right placement, right dimmer control. Here's the complete playbook.
Why Lighting Affects Your Simulator More Than You Expect
Your impact screen is a projection surface. Any light that hits it — overhead LEDs, wall fixtures, bounce from the ceiling — competes directly with your projector's output. The result is reduced contrast, washed-out colors, and a screen that looks worse than it should regardless of how much you paid for it.
Ready to shop impact screens?
Browse the full Carl's Place lineup — every screen ships ready to mount with real size specs.
Shop Carl's Place Impact Screens →But you can't just kill all the lights either. Your launch monitor's high-speed camera needs adequate illumination to track the ball. The practical target is 50–100 foot-candles (500–1,000 lux) in the hitting area — enough for the camera, not enough to wreck the image. (Source: Golf Simulator Advisor / ShopIndoorGolf Lighting Guide)
Hitting that window consistently requires thinking about three things: color temperature, placement, and dimmer control. Let's break each one down.
Color Temperature: The Spec That Actually Matters
Every LED bulb has a Kelvin rating. It's the warm-white vs. cool-white dial you've seen at the hardware store. Most people grab whatever's on sale. In a simulator room, that's a mistake.
The Target Range: 4,000K–5,000K
The recommended LED color temperature for golf simulator rooms is 4,000K–5,000K — neutral to cool daylight white. (Source: Virtual Tee Golf / Golf Simulator Advisor / BenQ Golf Simulator Resource) This range does two things well: it renders your projected image accurately (greens look green, not yellow-green), and it gives your launch monitor's camera the color fidelity it needs to read ball markings and spin dots without misreading.
Warm white LEDs at 2,700K–3,000K add a yellow cast to everything. Your on-screen fairways look off, and camera-based launch monitors can misinterpret spin markings. Anything above 5,500K pushes into harsh blue territory — fine for a photography studio, rough for a two-hour winter session where your eyes are already working hard.
CRI: The Other Number Worth Checking
Color Rendering Index (CRI) measures how accurately a light source renders colors compared to natural sunlight. LEDs rated CRI 90+ are classified as "excellent" and are the minimum recommended for simulator rooms where cameras must accurately read ball colors and spin markings. (Source: Waveform Lighting / LED Lighting Supply)
Cheap fluorescent shop lights often run CRI 50–85. For camera-based launch monitors especially, that's enough of a gap to cause misreads on spin-sensitive tracking. CRI 90+ LEDs cost a few dollars more and eliminate the variable entirely.
LED Color Temperature Options for Golf Simulator Rooms
Swipe to compare →
| Color Temp | Kelvin Range | Best For | Screen Impact |
|---|---|---|---|
| Warm White | 2700K–3000K | Living rooms, ambiance | Yellow cast distorts greens and ball colors — avoid |
| Neutral White | 3500K–4000K | General workspace | Acceptable balance; slight warmth, minimal color shift on screen |
| Cool Daylight (Recommended) | 4000K–5000K | Golf simulators, studios | Mimics natural daylight; accurate color for cameras and projected image |
| Daylight / Crisp White | 5500K–6500K | Photography studios | Slightly harsh blue tint; can cause eye fatigue in long sessions |
Placement: Where the Lights Go Is Half the Battle
Even perfect bulbs will hurt your image if you put them in the wrong spot. The core rule: light the golfer and the mat, not the screen.
Keep Fixtures Behind the Hitting Position
Overhead lights mounted directly above or in front of the screen will throw light onto the projection surface and fight your image. Mount fixtures over the hitting zone — behind the golfer relative to the screen — and angle them down toward the mat. That's where your launch monitor camera is pointing anyway.
Recessed can lights and track lighting aimed at the floor work well here. They illuminate the hitting area without casting meaningful light on the screen side of the room. If you're still in the planning phase, the guide on converting a spare room to a golf simulator covers the full infrastructure decisions that pair directly with your lighting design.
Side Walls: Go Easy
Wall-mounted sconces or strips on the side walls of the bay can add fill light without hitting the screen directly — especially useful if your launch monitor needs more even floor-level illumination. Keep them low and angled inward. Avoid anything mounted flush to the wall facing the screen.
If you're also dealing with windows or uncontrolled ambient light sources, that's a separate problem covered in detail in the post on golf impact screen ambient light problems.
Dimmer Control: Treat This as a Required Component
Fixed-brightness lights mean you're always making a compromise — enough light for the camera, or a clean image on the screen. A quality dimmer eliminates the trade-off. Before you tee off, dim down; when you need to work on equipment or review footage, bring the lights up. It should take one tap.
Use the Right Dimmer Type
Standard leading-edge (forward-phase) dimmers are designed for incandescent bulbs. Put them on LED fixtures and you'll get flickering, buzzing, or premature bulb failure. Use trailing-edge dimmers or 0-10V dimmers instead — they're specifically designed for LED loads. And confirm your bulbs are labeled "dimmable" before you buy.
Smart Dimming Is Worth It
Systems like Lutron Caseta let you program scenes — a "simulator mode" preset that dims the hitting zone to 30–40% and kills any fixtures on the screen side of the room. One button press, every session. Smart lighting systems are now present in 38% of smart homes, with 41% of users citing automated lighting schedules as a primary driver of adoption. (Source: SQ Magazine Smart Home Statistics 2025)
There's also a real energy case here. Modern dimmable LED systems running at an average 65% brightness level have achieved documented energy savings of 52% over three months compared to full-brightness operation. (Source: EnergyBot / bo-qi.com LED Dimming Analysis) For a room running 2–3 hour sessions daily, the dimmer pays for itself.
How Room Lighting Directly Affects Your Projector
This relationship determines everything. Every lumen of ambient light that hits your screen surface reduces your projected image's perceived contrast. The chart below shows how projector lumen requirements scale with ambient light level — and why a 1,750-lumen projector that looks great in a dark room falls completely flat when the overheads are on.
Projector Lumens Required by Room Ambient Light Level
Source: BenQ Projector Brightness Guide, ProjectorScreen.com, ViewSonic Lumens Guide
If you're researching projectors alongside your lighting build, the breakdown of throw ratio, lumens, and resolution for golf simulator projectors covers how to spec the right projector once your lighting plan is set.
By the Numbers: Golf Simulator Room Lighting
50–100 foot-candles (500–1,000 lux) — the target hitting area illumination. Enough light for your launch monitor camera to track the ball accurately, not enough to wash the screen. (Source: Golf Simulator Advisor / ShopIndoorGolf Lighting Guide)
2–3× more lumens required in a moderately lit room versus a fully dark one. That translates directly to projector purchase cost. Control your ambient light and you can buy a less expensive projector and still get better image quality. (Source: BenQ Projector Brightness Guide / ProjectorScreen.com)
CRI 90+ is the minimum for accurate ball and spin tracking. Standard fluorescent shop lights at CRI 50–85 can cause camera misreads on spin-sensitive launch monitors — an entirely avoidable variable. (Source: Waveform Lighting / LED Lighting Supply)
4,000K–5,000K is your target color temperature window. Below it and your screen colors shift warm; above it and your eyes pay the price over long sessions. (Source: Virtual Tee Golf / BenQ Golf Simulator Resource)
52% energy savings documented over three months in commercial spaces using smart dimming at an average 65% level. Dimmers aren't just about image quality — they're about not running full-power LEDs for three hours a day, every day. (Source: EnergyBot / bo-qi.com LED Dimming Analysis)
Quick-Reference Shopping Checklist
When you're at the hardware store or clicking through Amazon, here's what to look for:
- Color temperature: 4,000K–5,000K (marked on the box)
- CRI rating: 90 or higher
- Dimmable: Yes — confirm before buying
- Dimmer type: Trailing-edge or 0-10V (not standard incandescent dimmers)
- Placement: Behind the golfer, aimed at the mat — not in front of the screen
- Smart option: Lutron Caseta or similar for one-tap scene presets
None of this requires major construction. Swap the bulbs, reposition a fixture or two, add one dimmer switch. Most builders can handle this in an afternoon, and the image improvement is immediate and obvious.
Get the Screen Right Too
Dialed-in lighting makes a massive difference — but it only shows if your impact screen is actually built to project onto. A screen with poor surface uniformity, uneven tension, or the wrong material will still look mediocre no matter how well your room is lit.
Browse our full range of golf simulator impact screens — designed for true projection quality, consistent surface tension, and long-term durability. Get the lighting right, get the screen right, and your setup will look better than most commercial simulators.
Ready to light your bay? Shop lighting kits and golf simulator accessories at GolfingSim to finish your setup and sharpen launch-monitor tracking.
Related reading: Golf Simulator Room Speaker Setup Guide: Bluetooth vs. Wired, Placement, and Acoustics Explained · Golf Impact Screen White vs Gray: Which Color Wins in Your Room?


Not sure which simulator fits your room?
The two-minute Simulator Finder Quiz checks your space and budget against every system we carry.

Keep Reading
Related guides

golf simulatorGolf Simulator Enclosure Lighting Plan: Where to Mount Fixtures So They Never Wash Out Your Screen

golf simulatorGolf Simulator Basement Conversion Checklist: The 7 Steps to Run Before You Buy Anything

DIY golf simulatorGolf Simulator Garage Build Cost Breakdown: Every Line Item at Three Budget Tiers